> For the complete documentation index, see [llms.txt](https://vesta-guide.gitbook.io/vesta-guide/llms.txt). Markdown versions of documentation pages are available by appending `.md` to page URLs; this page is available as [Markdown](https://vesta-guide.gitbook.io/vesta-guide/vesta-075.md).
# VESTA-075
**WTRZ Series**
## **Emergency Pendant / Wrist Transmitter**
***Easy & Exchangeable Belt / Neck Cord styles***
***Long battery life***
***Waterproof***
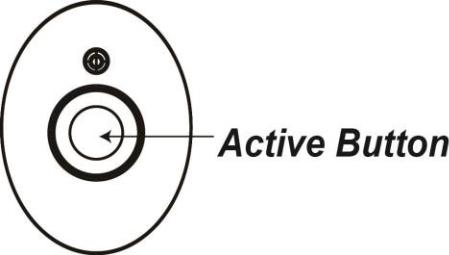
## ***Active Button***
* Pressing the Active Button for more than 1 second will activate the Control Panel, causing it to dial emergency call or alarm.
* Press and hold the Active Button for 8 seconds to send a Cancel Code to the Control Panel. (This function is not compatible with every control panel).
## ***Learn in the Transmitter***
Step 1. Put the Control Panel into the learning mode.
Step 2. Press the Button on the Transmitter, a radio signal will be transmitted to the Control Panel.
Step 3. Please refer to the operation manual of your Control Panel to complete the learning process.
## ***Battery Life***
The Transmitter uses one CR2032 3V Lithium battery as its power source.
*\*
* A 30-second interval is required between each Active Button press to check the battery voltage again.
## ***Auto Low Battery Detection***
The Wrist Transmitter features Auto Low Battery detection function.
* The Wrist Transmitter will automatically check battery voltage every 16-24 hours. If low battery is detected 3 times in a row, the Wrist Transmitter will enter low battery status and transmit low battery signal every 12 hours.
## ***Wearing as a Wristband***
**STEP 1.** Insert the pendant into the wristband cover.
**STEP 2.** Thread the band through the wristband cover.
**Step 3.** Continue to thread through and the wristband is done.
## ***Wearing as a Necklace***
**STEP 1.** Thread the neck cord through the hook.
**STEP 2.** Thread the small cap through the thread and make a knot near the end of the thread.
**Step 3.** Connect the caps at both ends of the thread.
## ***Compliance with Standards***
Complies with the requirements of the Radio Equipment Directive 2014/53/EU
Electromagnetic Compatibility Directive 2014/30/EU, Low Voltage Directive 2014/35/EU
Safety: EN 60950-1:2006+A11:2009+A1:2010+A12:2011+A2:2013
EMC:
EN 50130-4:2011+A1:2014
EN 301489-1:V2.2.0:2017
EN 301489-3:V2.1.1:2017
Radio: EN 300220-1:V3.1.1:2017
EN 300220-2:V1.1.1:2017
EN 300220-3-1:V1.1.1:2017
EN 300220-3-2:V1.1.1:2017
## ***FCC Statement***
*This device complies with Part 15 of the FCC Rules. Operation is subject to the following two conditions:*
1. *This device may not cause harmful interference, and*
2. *This device must accept any interference received, including interference that may cause undesired operation.*
### ***FCC Caution:***
*To assure continued compliance, any changes or modifications not expressly approved by the party responsible for compliance may void the user's authority to operate this equipment. (Example - use only shielded interface cables when connecting to computer or peripheral devices).*


