> For the complete documentation index, see [llms.txt](https://vesta-guide.gitbook.io/vesta-guide/llms.txt). Markdown versions of documentation pages are available by appending `.md` to page URLs; this page is available as [Markdown](https://vesta-guide.gitbook.io/vesta-guide/romanian-ro/vesta-156.md).
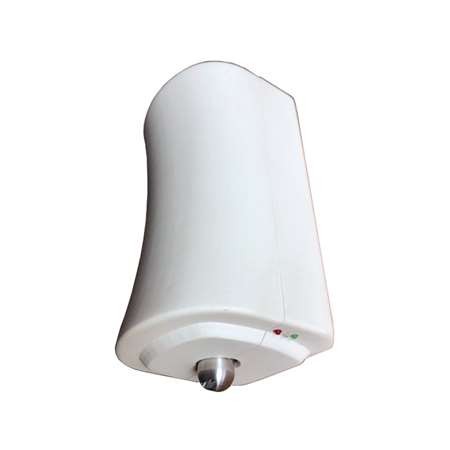
# VESTA-156
Manual de configurare al VESTA-156
## ÎNAINTE DE TOATE:
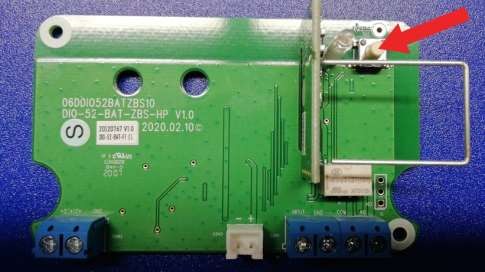
### • Conectați bateria modulului I/O

{% hint style="danger" %}
NOTĂ:
### Conectați generatorul de fum la bornele „smoke” doar DUPĂ ce au fost efectuate testele de funcționare.
{% endhint %}
## Învățarea modulului I/O pe panou
1. Activați funcția de învățare pe panou (pentru informații suplimentare, consultați manualul panoului)


2. Apăsați butonul de pe modulul I/O instalat în interiorul VESTA-156
3. Selectați dispozitivul detectat și apăsați OK

4. Atribuiți zona corespunzătoare dispozitivului de ieșire (DO) și alegeți numărul zonei și numele dispozitivului: ACTIVARE FUM

{% hint style="warning" %}
Notă: Modulul de ieșire (DO) trebuie setat ca „Dispozitive separate”
{% endhint %}
5. Atribuiți la (DI) aceeași zonă ca dispozitivului de ieșire (DO) și alegeți numărul zonei și numele dispozitivului: MANIPULARE FUM.

6. Setați modulul de intrare ca Alarmă Antiefracție 24H
## Regulă de activare a configurației
În meniul „regulă de automatizare” creați o regulă nouă după cum este indicat mai jos:

## Configurare dublă coincidență
În setările dispozitivului, configurați cel puțin 2 dispozitive cu atributul „Cross zone” pentru a activa generatorul de fum DOAR în cazul activării ambelor dispozitive într-un interval de timp programabil și astfel evitați activările necorespunzătoare.
Exemplu de programare Cross Zone:


În meniul „Securitate”, setați temporizatorul pentru cross zones la 1 minut sau mai mult (timpul în care cele 2 zone trebuie activate pentru a declanșa generatorul de fum)

---
# Agent Instructions
This documentation is published with GitBook. GitBook is the documentation platform designed so that both humans and AI agents can read, navigate, and reason over technical content effectively. Learn more at gitbook.com.
## Querying This Documentation
If you need additional information that is not directly available in this page, you can query the documentation by asking a question.
Perform an HTTP GET request on the following URL with the `ask` and `goal` query parameters:
```
GET https://vesta-guide.gitbook.io/vesta-guide/romanian-ro/vesta-156.md?ask=&goal=
```
`ask` is the immediate question: it should be specific, self-contained, and written in natural language.
`goal` is what the user is ultimately trying to achieve, the reason they need the answer. Sharing it helps GitBook give you a better, more relevant answer. A goal is most helpful when it describes the outcome the user wants rather than restating the question. For example, with `ask=how do I create an API token`, a goal like `automate deployments from our CI pipeline` lets GitBook tailor the answer to that use case.
The response will contain a direct answer to the question and relevant excerpts and sources from the documentation.
Use this mechanism when the answer is not explicitly present in the current page, you need clarification or additional context, or you want to retrieve related documentation sections.